Winter-Proofing Your Farm: Essential Strategies for Western Washington Farmers


Introduction

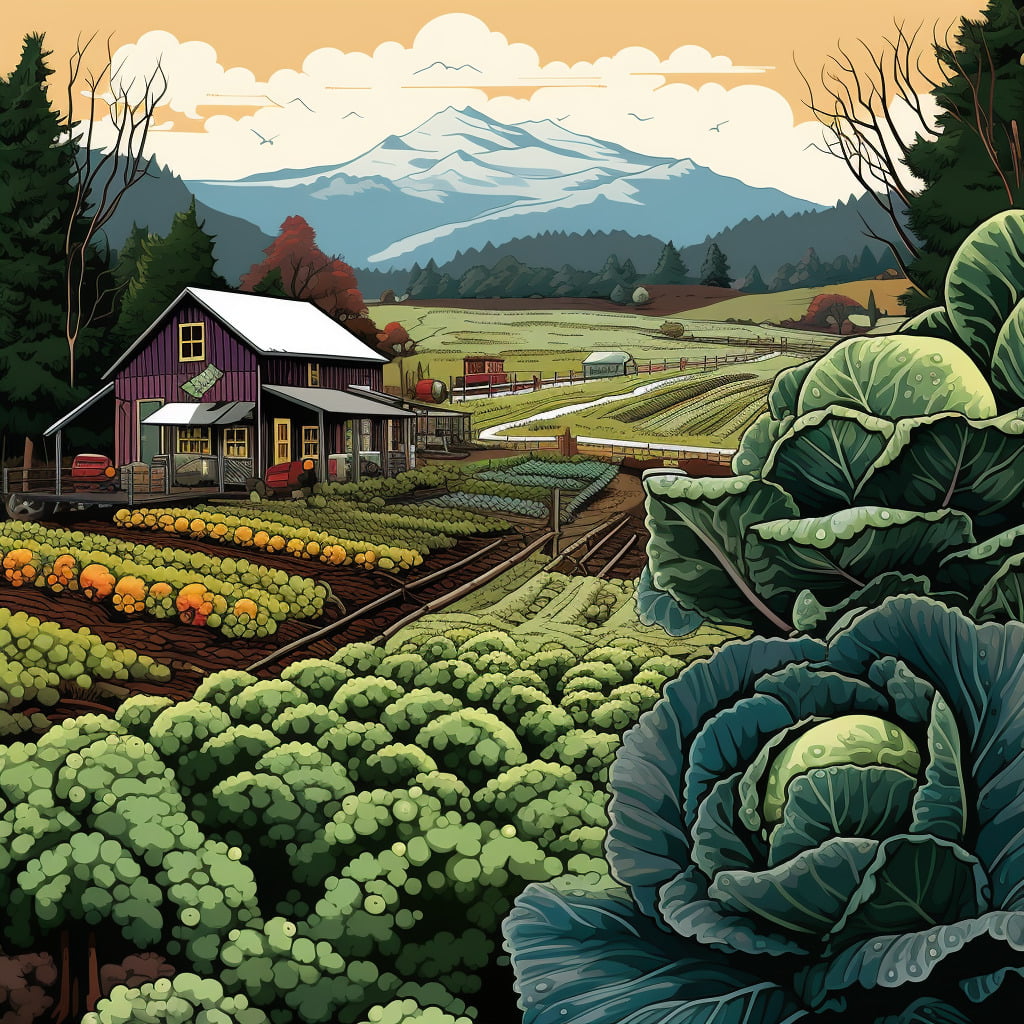
As the crisp air of autumn gives way to the chill of winter, farmers across Western Washington are reminded of the relentless challenge that the season brings. Known for its diverse agricultural landscape, from lush orchards to robust livestock farms, Western Washington is a region where farming is not just a livelihood but a way of life. However, with winter comes a unique set of challenges that can test even the most experienced farmer. The region is characterized by its wet, often unpredictable weather, with temperatures that can dip low enough to threaten crops and livestock alike.

In this blog post, we delve into the essential strategies for weatherproofing your farm against the winter conditions of Western Washington. Whether you’re tending to acres of crops or caring for a herd, the coming months demand preparation and foresight to ensure the survival and productivity of your farm. We’ll explore a range of topics, from structural reinforcements and livestock care to crop protection and sustainable energy solutions, each tailored to the unique climatic conditions of the region.

But why is weatherproofing so crucial? In simple terms, the longevity and success of your farming endeavors hinge on how well you prepare for and adapt to the winter season. Uninsulated buildings, unprotected crops, or inadequately cared-for livestock can lead to significant losses, both financially and in terms of your hard work. Conversely, a well-prepared farm can not only withstand the winter but also emerge stronger and more efficient in the spring.

This guide is designed to equip you with the knowledge and tools to effectively safeguard your farm against the cold and damp, ensuring that when winter does arrive, you and your farm are ready. From practical tips to innovative solutions, we aim to cover all that you need to know to make this winter a season of triumph rather than trial for your farm.

Understanding Western Washington’s Winter Climate

The key to effective weatherproofing lies in understanding the specific challenges posed by the winter climate in Western WA. This region, distinct in its climatic patterns, experiences a range of weather conditions that can significantly impact agricultural practices.

A. Characteristic Weather Patterns

1. Temperature Variations: Western Washington’s winter temperatures are generally moderate but can occasionally plummet, leading to frost and freezing conditions. These temperature dips, although not consistently extreme, are enough to damage sensitive crops and stress livestock.

2. High Precipitation Levels: The region is known for its high levels of rainfall during winter. This consistent moisture can be a double-edged sword; while it ensures adequate water supply, it also raises concerns like soil erosion, waterlogging, and flooding, which can be detrimental to both crops and farm infrastructure.

3. Wind and Storms: Winter storms, accompanied by strong winds, are not uncommon in this area. These can cause physical damage to structures and plants and contribute to a significant chill factor, affecting both humans and animals on the farm.

B. Impacts on Different Farm Types

1. Livestock Farms: The combination of cold and wet conditions can be particularly challenging for livestock health. Respiratory issues and increased susceptibility to diseases are common concerns. Adequate shelter, nutrition adjustments, and health monitoring become paramount.

2. Crop Farms: For crop farmers, the primary concerns are frost damage and excessive soil moisture. Certain crops may require additional protective measures such as mulching or the use of greenhouses. Managing drainage and preventing nutrient runoff also become critical tasks.

3. Orchards: Orchards face the risk of frost damage, which can affect bud and fruit development. Winter pruning and appropriate soil care are essential to safeguard these perennial crops.

C. Adapting to the Climate

Understanding these weather patterns and their implications allows farmers to strategize effectively. It involves a combination of preventive measures, like infrastructure reinforcement, and adaptive strategies, such as choosing the right crop varieties or livestock breeds suited to these conditions.

As we progress through this guide, we’ll explore specific strategies to combat each of these challenges, tailored to the diverse needs of WA state farms. From innovative farming techniques to tried-and-tested practices, the focus will be on practical, actionable solutions that can be implemented to protect your farm from the winter elements.

farm in winter. snow is on the ground and a mountain looms in the background

Structural Weatherproofing

The buildings and structures on your farm play a critical role in weatherproofing. Proper maintenance and reinforcement of these structures can make a significant difference in how your farm withstands the winter months.

A. Buildings and Barns

  1. Insulation and Sealing: Proper insulation is vital for maintaining temperature and reducing heating costs. Focus on insulating walls and installing weather stripping around doors and windows to prevent drafts. Additionally, sealing any cracks or gaps in the structure can prevent moisture intrusion, which is crucial in the damp conditions we face.
  2. Roof Maintenance and Snow Load: Regular inspection and maintenance of roofs are essential to prevent leaks and collapse under heavy snow or rain. Reinforce the structural integrity of roofs and clear gutters and drainage paths to prevent water accumulation.
  3. Windproofing: Strong winds can cause significant damage. Reinforce barn doors and windows and consider installing windbreaks or shelterbelts around your buildings to minimize wind impact.

B. Greenhouses and Crop Covers

  1. Materials and Structural Design: Choose durable materials for greenhouses, such as polycarbonate panels, which offer better insulation and resilience against snow and wind compared to glass. The structural design should facilitate snow shedding and withstand high winds.
  2. Temperature Control and Ventilation: Install thermostatically controlled heating systems to maintain optimal temperatures. Proper ventilation is crucial to prevent overheating and humidity build-up, which can lead to mold and mildew.

C. Storage and Utility Areas

  1. Water System Protection: Insulate pipes and install heat tapes to prevent freezing. Ensure that your water storage tanks are well-maintained and insulated against the cold.
  2. Safe Storage of Chemicals and Feed: Store farm chemicals and feed in a dry, well-ventilated area to prevent spoilage and degradation. Ensure that these storage areas are securely sealed to keep out moisture and pests.

D. Adaptations for Specific Farm Types

  1. Livestock Housing: In addition to general structural considerations, livestock housing may require specific adaptations such as heated water troughs, draft-free ventilation, and sufficient dry bedding to keep animals warm and healthy.
  2. Crop Storage and Processing Areas: Ensure that crop storage areas like root cellars or grain bins are moisture-free and well-ventilated. Consider adding additional insulation or climate control systems if storing sensitive products.

By focusing on these key areas of structural weatherproofing, you can significantly enhance your farm’s resilience to the winter weather. Each of these measures not only provides immediate benefits in terms of protection and efficiency but also contributes to the long-term sustainability and profitability of your farming operation.

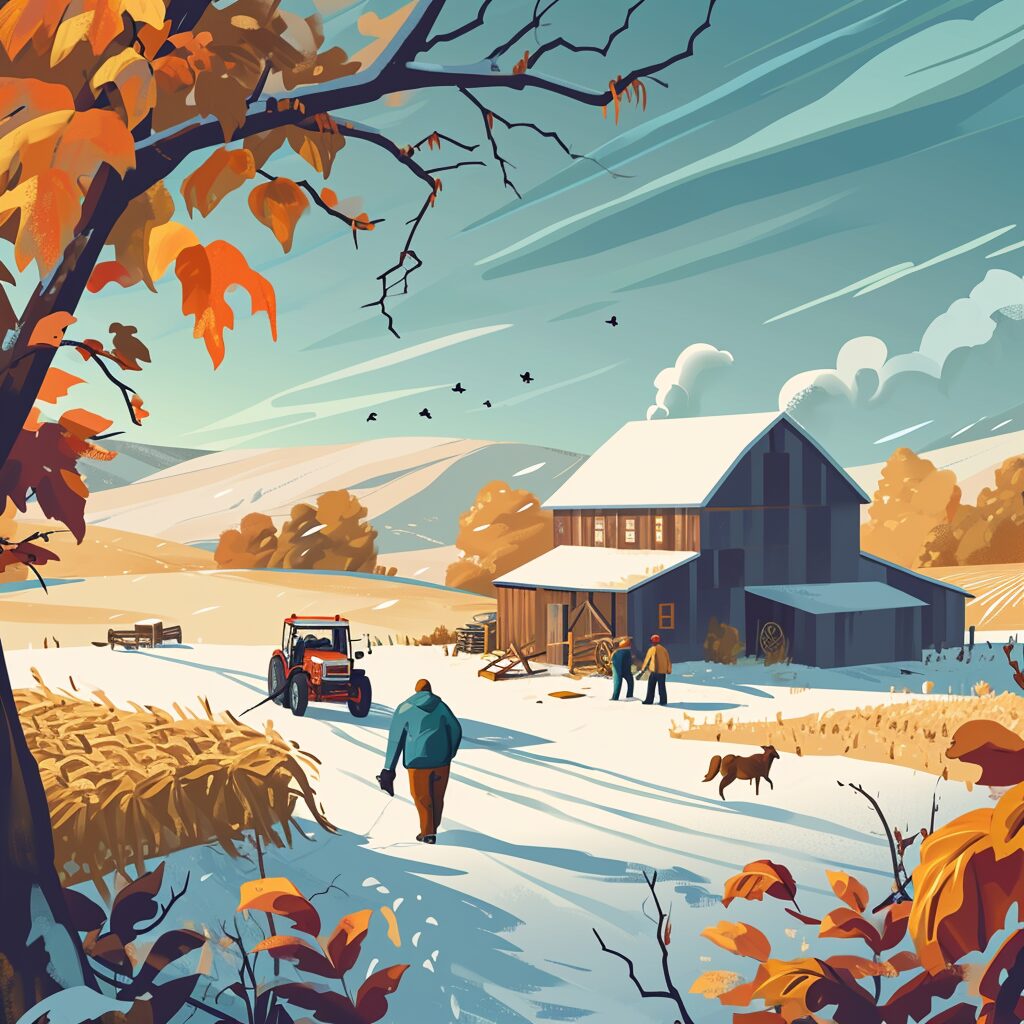
Livestock Care During Winter

Caring for livestock during winter requires a proactive approach to ensure their health, comfort, and productivity. The cold, wet weather can pose significant risks to animals if not properly managed.

A. Housing and Bedding

  1. Shelter Requirements: Livestock shelters should be sturdy, well-insulated, and free from drafts, yet still ventilated to prevent moisture buildup. Ensure roofing is leak-proof to keep animals dry during heavy rainfalls.
  2. Bedding Management: Use dry, insulating materials like straw or wood shavings for bedding. Regularly replace bedding to keep it dry and clean, reducing the risk of diseases and providing warmth.
  3. Space and Comfort: Ensure that each animal has enough space to move freely without overcrowding, which can lead to stress and health issues. Consider the specific space requirements for different types of livestock.

B. Feeding and Hydration

  1. Nutritional Adjustments: In winter, animals often require more calories to maintain body heat. Increase feed rations accordingly, focusing on high-energy foods. Consult a livestock nutritionist for specific dietary recommendations.
  2. Water Access: Prevent water from freezing and ensure a continuous supply of fresh water. Heated water troughs or insulated water containers can be effective solutions.
  3. Special Care for Young and Vulnerable Animals: Pay extra attention to the nutritional and shelter needs of calves, lambs, and other young animals. Elderly or sick animals may also require additional care and monitoring.

C. Health Monitoring

  1. Regular Check-ups: Keep a closer eye on your livestock for signs of cold stress, respiratory problems, or frostbite, especially in extremities like ears and tails. Early detection and treatment of any health issues are crucial.
  2. Parasite Control: Winter can see a rise in certain parasites. Maintain a regular deworming and parasite control schedule to keep your livestock healthy.
  3. Emergency Preparedness: Have a plan in place for veterinary emergencies, including easy access to a veterinarian who can provide services during harsh weather conditions.

D. Exercise and Outdoor Access

  1. Outdoor Time: Whenever weather permits, allow livestock some time outside. This helps maintain their health and reduces stress. Ensure that outdoor areas are safe and free from hazards like ice or deep snow.
  2. Protective Measures: For breeds less tolerant to cold, consider additional protective measures like windbreaks in outdoor areas or even coats for individual animals, especially in the case of horses or young calves.

By implementing these guidelines for livestock care during winter, farmers can ensure the well-being of their animals. Each step, from optimized shelter and nutrition to vigilant health monitoring, plays a vital role in safeguarding livestock against the challenges of the winter season.

Protecting Crops and Orchards

Winter poses specific challenges to crops and orchards, including frost, excess moisture, and the risk of disease. Effective strategies must be employed to protect these vital components of the agricultural landscape.

A. Frost Protection

  1. Frost Cloths and Covers: Utilize frost cloths or plant covers for sensitive crops. These materials help to trap heat and reduce the impact of frost on plants.
  2. Windbreaks: Planting or constructing windbreaks can reduce wind speed and mitigate the effects of cold winds on crops and orchards. This can also help in reducing the drying effect of cold winds on soil and plants.
  3. Heating: In certain situations, using heaters in fields or orchards can be effective. This is more common in high-value crop areas where the cost can be justified.

B. Soil Management

  1. Erosion Control: Implement measures like cover cropping or mulching to prevent soil erosion during heavy rains. These practices also help in maintaining soil health and fertility.
  2. Drainage Improvement: Ensure proper drainage in fields to prevent waterlogging. This may involve installing drainage systems or creating natural drainage paths.
  3. Nutrient Management: Apply organic matter like compost to improve soil structure and nutrient content, helping plants withstand winter stress.

C. Winter Pruning

  1. Orchard Trees: Late winter is often the best time for pruning fruit trees. Pruning helps in removing dead or diseased wood and allows for better light penetration and air circulation, which is vital for tree health.
  2. Technique and Timing: Employ proper pruning techniques and timings for different tree types to ensure healthy growth in spring. This may vary based on the type of orchard and local climate conditions.

D. Water Management

  1. Rainwater Harvesting: Implement systems to collect and store rainwater. This not only helps in managing excess water but also provides a resource for irrigation during drier periods.
  2. Irrigation Adjustments: Modify irrigation schedules to account for decreased evapotranspiration rates in winter. Over-irrigation can lead to waterlogging and increase the likelihood of root diseases.

E. Disease and Pest Control

  1. Monitoring and Management: Regularly inspect crops for signs of disease or pest infestation. Winter can bring specific challenges, such as fungal diseases due to wet conditions.
  2. Integrated Pest Management (IPM): Employ IPM strategies, combining biological, cultural, and chemical methods to manage pests and diseases effectively and sustainably.

Water Management

Effective water management is crucial for farms, especially during winter when the risks of freezing and flooding are heightened. Managing water resources wisely can prevent damage to infrastructure and ensure adequate water supply for livestock and crops.

A. Preventing Freezing in Water Systems

  1. Insulation of Pipes and Taps: Insulate water pipes, especially those exposed to the outside, to prevent them from freezing. Using foam insulation sleeves or heat tape can be effective.
  2. Heated Water Troughs for Livestock: Install heated water troughs or use immersion heaters in existing troughs to keep water from freezing, ensuring a constant supply of drinking water for animals.
  3. Regular Checks and Maintenance: Routinely check your water systems for leaks or blockages. Repair any issues promptly to prevent problems from escalating during cold spells.

B. Rainwater Harvesting and Drainage

  1. Rainwater Collection Systems: Implement systems to collect and store rainwater from roofs and other surfaces. This can provide an additional water resource and help manage runoff.
  2. Effective Drainage Planning: Ensure your farm has proper drainage to prevent waterlogging and flooding. This might include installing French drains, ditches, or culverts.
  3. Surface Water Management: Manage the flow of surface water across your farm to prevent erosion and nutrient loss. Consider using swales, contour plowing, or terracing.

C. Flood Prevention and Mitigation

  1. Floodplain Awareness: Understand if parts of your farm are in a floodplain and plan accordingly. Elevating critical infrastructure and creating barriers can be part of this strategy.
  2. Emergency Response Plan: Develop an emergency plan for flooding, including routes for moving livestock to higher ground and protecting essential equipment and feed.
  3. Collaboration with Local Authorities and Neighbors: Stay informed about local water management plans and collaborate with nearby farms and authorities for comprehensive flood response strategies.

D. Irrigation Adjustments

  1. Winter Irrigation Needs: Recognize that irrigation needs are reduced in winter. Adjust your irrigation schedules based on weather forecasts and soil moisture levels.
  2. Protecting Irrigation Equipment: Winterize irrigation systems to prevent damage. This includes draining pipes, shutting off water supply to outdoor taps, and storing portable equipment in a dry place.
  3. Planning for Spring: Use the winter period to plan and maintain your irrigation systems for the upcoming growing season, ensuring everything is in optimal condition.

Equipment Maintenance

Proper maintenance and preparation of farm equipment are vital for winter resilience. The cold, wet conditions can be harsh on machinery, and readiness is key to preventing downtime and costly repairs.

A. Winterizing Machinery and Vehicles

  1. Engine and Battery Care: Ensure that all vehicles and machinery are fitted with winter-grade oil. Check and replace batteries if necessary, as cold weather can reduce their efficiency.
  2. Antifreeze Levels: Verify that antifreeze levels are adequate in all machinery and vehicles to prevent freezing.
  3. Hydraulic and Fuel Systems: Drain any water from hydraulic systems to prevent freezing and damage. Use fuel additives to prevent diesel fuel from gelling in low temperatures.

B. Safe Storage of Equipment and Tools

  1. Dry, Protected Storage: Store equipment and tools in a dry, covered area to protect them from the elements. This prevents rust and corrosion caused by moisture.
  2. Organized and Accessible: Keep your equipment organized and easily accessible. This saves time and effort when machinery is needed, especially during adverse weather conditions.
  3. Tool and Equipment Checks: Regularly inspect tools and equipment for wear and tear. Fixing minor issues before they escalate can save time and money.

C. Emergency Preparedness

  1. Generators and Heaters: Ensure that generators are in good working order and that you have a sufficient supply of fuel. Portable heaters can be critical in workshops and barns for both work efficiency and preventing equipment from freezing.
  2. Snow Removal Equipment: Keep snow removal equipment like plows and blowers ready and in good condition. This is essential for maintaining access around the farm.
  3. Backup Plans for Power Outages: Have a plan in place for power outages, including backup lighting and alternative power sources for essential farm operations.

D. Seasonal Equipment Transition

  1. Seasonal Maintenance Routines: Transition equipment from summer to winter use. This includes fitting tractors with snow tires or chains and preparing snow removal equipment.
  2. Lubrication and Cleaning: Lubricate moving parts to prevent them from seizing in the cold and clean equipment to remove any debris that could cause damage or inefficiency.
  3. Record Keeping: Keep detailed records of all maintenance activities. This helps in tracking the condition of your equipment and planning future maintenance activities.

Proper equipment maintenance and preparedness are crucial for smooth farm operation during winter. Taking proactive steps to ensure that all machinery and tools are in prime condition not only minimizes the risk of breakdowns but also enhances safety and efficiency on the farm during the challenging winter months.

Sustainable Energy Solutions

Adopting sustainable energy solutions can significantly benefit farms, especially during the winter months. These practices not only reduce the farm’s carbon footprint but also enhance energy efficiency and can lead to cost savings in the long run.

A. Utilizing Solar Power for Heating and Lighting

  1. Solar Panels: Install solar panels to harness solar energy. While winter days are shorter, modern solar panels are efficient enough to capture the available sunlight, providing a renewable source of energy for farm operations.
  2. Solar Water Heaters: Use solar water heaters for livestock barns and greenhouses. These can be more efficient and sustainable compared to traditional water heating methods.
  3. Solar Lighting: Implement solar-powered lighting systems, particularly in outdoor areas. This reduces dependency on the electrical grid and provides reliable lighting, even during power outages.

B. Wind Energy Opportunities

  1. Wind Turbines: Consider installing small wind turbines if your farm is in an area with sufficient wind resources. Wind power can supplement your energy needs, particularly during winter when wind levels can be higher.
  2. Integrating with Existing Systems: Combine wind energy systems with existing power sources for a more robust and reliable energy supply.

C. Insulation and Energy Conservation

  1. Building Insulation: Enhance the insulation in farm buildings. This reduces the need for heating, thereby saving energy and reducing costs.
  2. Energy-Efficient Appliances: Invest in energy-efficient appliances and systems, especially for heating and ventilation. Look for ENERGY STAR-rated products that offer better efficiency.
  3. Smart Thermostats: Use smart thermostats in greenhouses and indoor facilities to regulate temperature more effectively and conserve energy.

D. Biomass for Heating

  1. Biomass Boilers: Utilize biomass boilers, which can burn wood chips, pellets, or agricultural waste to produce heat. This is particularly relevant for farms with access to biomass materials.
  2. Combined Heat and Power (CHP): Implement CHP systems that use biomass to generate both heat and electricity, enhancing the overall efficiency of energy use on the farm.

E. Sustainable Farm Practices

  1. Energy Audits: Conduct energy audits to identify areas where energy efficiency can be improved. This helps in prioritizing investments in sustainable solutions.
  2. Conservation Techniques: Adopt conservation techniques such as reducing unnecessary energy use, optimizing equipment use schedules, and maintaining machinery to operate at peak efficiency.
  3. Community Renewable Energy Projects: Participate in community-based renewable energy projects, which can provide cost-effective and sustainable energy solutions while fostering community engagement.

By integrating these sustainable energy solutions, farms in can navigate the challenges of winter more effectively, reducing energy costs and contributing to environmental sustainability. These solutions not only address immediate energy needs but also position the farm for long-term sustainability and resilience.

Emergency Preparedness and Weather Monitoring

Winter can bring unpredictable weather, making emergency preparedness and weather monitoring essential for farm management. Being well-prepared can help minimize damage and ensure the safety of both people and animals on the farm.

A. Creating a Farm Emergency Plan

  1. Identify Risks: Assess your farm for potential winter hazards such as flooding, heavy snowfall, and power outages. Understanding these risks is the first step in creating an effective emergency plan.
  2. Develop Response Strategies: Outline specific actions to be taken in response to different emergencies, including evacuation routes for livestock, locations of emergency supplies, and contact information for local emergency services.
  3. Communication Plan: Establish a clear communication plan to ensure that all farm workers and family members are informed and know their roles in an emergency.

B. Utilizing Weather Forecasting Tools and Apps

  1. Reliable Forecasting Sources: Use trusted weather forecasting tools and apps to stay informed about upcoming weather conditions. This can help in making timely decisions to protect crops, livestock, and infrastructure.
  2. Real-Time Alerts: Subscribe to real-time weather alerts for immediate updates on severe weather conditions. This can be crucial for taking swift actions to mitigate risks.

C. Community Resources and Support Networks

  1. Local Agricultural Extensions: Engage with local agricultural extension services for expert advice and support. They can provide valuable resources and information specific to farming in Western Washington.
  2. Networking with Other Farmers: Build a network with other farmers in the region. Sharing experiences and strategies can be invaluable, especially in dealing with regional weather challenges.
  3. Emergency Services Coordination: Coordinate with local emergency services and understand their capabilities and limitations. Knowing how to effectively work with these services can be critical during a crisis.

D. Farm Infrastructure and Supplies

  1. Backup Power Solutions: Ensure you have reliable backup power solutions, such as generators, in case of power outages. Regularly test and maintain these systems.
  2. Emergency Supplies: Stock up on essential supplies including food, water, medication for livestock, and first-aid kits. Ensure that these supplies are easily accessible.
  3. Building and Equipment Checks: Regularly inspect and maintain buildings and equipment to ensure they can withstand severe weather conditions.

E. Insurance and Documentation

  1. Review Insurance Coverage: Regularly review your insurance policies to ensure they cover winter-related damages. Understand what is and isn’t covered under your current plan.
  2. Document Assets: Keep an updated record of all your farm assets, including livestock, equipment, and buildings. This documentation is crucial for insurance claims in case of damage.

By focusing on emergency preparedness and weather monitoring, you can significantly reduce the impact of winter emergencies. This proactive approach ensures that the farm, its assets, and its inhabitants are safeguarded against the unpredictable nature of winter weather.

Financial and Insurance Considerations

Navigating the financial aspects of winter weatherproofing and dealing with the potential impacts on your farm’s finances are crucial. Understanding and managing these factors can help ensure the economic stability and sustainability of your farm.

A. Cost-Effective Weatherproofing Investments

  1. Prioritizing Investments: Assess your farm to identify the most vulnerable areas and invest in weatherproofing measures that offer the highest return on investment. This could include improving insulation, upgrading to energy-efficient systems, or enhancing water management.
  2. Long-Term Savings: Consider the long-term savings of weatherproofing investments. For example, energy-efficient upgrades may have upfront costs but can lead to significant savings in utility bills over time.
  3. Grants and Funding Opportunities: Explore grants and funding opportunities available for farmers. Many government and private programs offer financial assistance for sustainability projects and disaster preparedness.

B. Insurance Options for Weather-Related Farm Damage

  1. Reviewing Insurance Policies: Regularly review your farm insurance policies to ensure they cover key risks associated with winter weather, such as crop damage, livestock losses, and property damage.
  2. Understanding Coverage Details: Pay close attention to the details of your insurance coverage, including deductibles, exclusions, and claim processes. Ensure that your coverage matches the specific risks of your region.
  3. Specialized Insurance Products: Consider specialized insurance products tailored to the needs of farmers, such as crop insurance, livestock insurance, and business interruption insurance.

C. Financial Planning and Management

  1. Emergency Funds: Establish an emergency fund to cover unexpected expenses related to winter damage. This can provide financial cushioning and reduce stress during challenging times.
  2. Budgeting for Winter Expenses: Include winter weatherproofing and emergency response costs in your annual budget. Planning for these expenses in advance can help avoid financial strain.
  3. Diversification of Income: Explore ways to diversify your farm income to mitigate the financial impact of a bad winter. This could include adding new revenue streams, such as agritourism or value-added products.

D. Record Keeping and Documentation

  1. Maintaining Detailed Records: Keep detailed records of all weatherproofing measures, repairs, and maintenance activities. This documentation is important for insurance claims and financial planning.
  2. Tracking Expenses and Savings: Monitor and record the expenses and savings associated with weatherproofing efforts. This helps in evaluating the effectiveness of your investments and planning future actions.

Conclusion

As we wrap up our comprehensive guide to weatherproofing your farm for the winter months, it’s important to revisit the key strategies we’ve discussed. From structural fortifications and livestock care to crop protection and sustainable energy solutions, each element plays a vital role in preparing your farm for the challenges of winter. Remember, the goal is not just to endure the winter but to emerge from it with a farm that is strong, productive, and resilient.

The importance of early and thorough preparation cannot be overstated. By taking proactive steps now, you can mitigate the risks posed by the cold, wet conditions typical of Pacific Northwest winters. This involves not only physical preparations but also financial planning and emergency readiness. The efforts you put in today will pay dividends in the form of a farm that thrives year-round, regardless of the weather.

We encourage you to start your winter preparations early. Assess your farm’s specific needs, implement the strategies discussed, and continuously monitor and adapt to changing conditions. The dynamic nature of farming means that what works one year may need tweaking the next. Stay informed, stay flexible, and stay connected with the farming community for shared insights and support.

References and Additional Resources

Websites:

  1. Washington State University Extension: Offers resources on agricultural practices, crop and livestock management specific to Washington State. – https://extension.wsu.edu/
  2. National Weather Service – Seattle: Provides local weather forecasts and alerts, crucial for winter planning.- https://www.weather.gov/sew/
  3. USDA Natural Resources Conservation Service: Offers information on soil, water management, and conservation practices.- https://www.nrcs.usda.gov/
  4. Washington State Department of Agriculture: A resource for state-specific agricultural regulations, grants, and farming news. – https://agr.wa.gov/
  5. Farmers.gov: Managed by the USDA, this site provides comprehensive resources on farm management, disaster assistance, and conservation programs. – https://www.farmers.gov/

Books:

  1. “The Winter Harvest Handbook” by Eliot Coleman: This book offers extensive insights into year-round vegetable production, with a focus on cold-weather strategies.
  2. Storey’s Guide to Raising Beef Cattle, 4th Edition: Health, Handling, Breeding” by Heather Smith Thomas: A comprehensive guide covering the care, management, and health of cattle, useful for winter care strategies.
  3. “The Farmer’s Office: Tools, Tips and Templates to Successfully Manage a Growing Farm Business” by Julia Shanks: Useful for financial planning and management, particularly relevant for preparing and recovering from winter seasons.
  4. “The New Organic Grower, 3rd Edition” by Eliot Coleman: Provides sustainable farming practices, with insights into crop rotation, composting, and efficient farm design that can be adapted for winter.
  5. “Holistic Management: A Commonsense Revolution to Restore Our Environment” by Allan Savory and Jody Butterfield: Offers insights into managing land sustainably, which is crucial for adapting to and mitigating the effects of extreme weather.

Beekeeping in the Pacific Northwest: A Farmer’s Guide to Pollination Partners

Introduction
Incorporating beekeeping into agricultural practices is a transformative step for farmers in the Pacific Northwest. This fusion not only boosts crop yields through improved pollination but also nurtures the entire ecosystem. This comprehensive guide explores the myriad benefits of beekeeping and offers a step-by-step approach for farmers to seamlessly integrate this practice, with a focus on selecting the most suitable bee species for this unique region.

The Multifold Benefits of Bees in Agriculture

  1. Pollination Powerhouses: Bees, particularly honeybees, are vital for pollinating a wide array of crops. Their tireless work increases both the quality and quantity of agricultural produce.
  2. Ecosystem Champions: Bees are biodiversity heroes, playing a significant role in the health of natural ecosystems by pollinating wild flora.
  3. Honey: Liquid Gold: Beekeeping opens doors to markets hungry for local, artisanal honey and other bee-derived products like beeswax and royal jelly.
  4. Community and Educational Benefits: Beekeeping creates opportunities for community engagement and serves as a powerful educational tool about the importance of sustainable agriculture.

Choosing the Right Bee Species for the Pacific Northwest

  1. European Honeybee (Apis mellifera): This species is renowned for its honey production and pollination efficiency. It’s well-suited to the climate of the Pacific Northwest, being hardy and adaptable.
  2. Mason Bees (Osmia spp.): For farmers focusing on fruit crop pollination, Mason bees are excellent. They are native to North America and are particularly effective pollinators for orchards.
  3. Bumblebees (Bombus spp.): Ideal for greenhouse operations and crops requiring buzz pollination, such as tomatoes. Bumblebees are native to the region and adept at pollinating in cooler temperatures.

Launching Your Beekeeping Journey

  1. Learning Bee Basics: Familiarize yourself with bee behavior and lifecycle, especially of the species you choose to host.
  2. Essential Beekeeping Gear: Start with hives, protective clothing, a smoker, and hive tools. Quality equipment is crucial for effective and safe beekeeping.
  3. Strategic Hive Placement: Position your hives in sunny, sheltered spots with access to diverse flora and water. Avoid high-traffic areas to minimize disturbance.
  4. Acquiring Your Bees: You can purchase bee colonies or attract native bees to your farm by planting bee-friendly flora.
  5. Year-Round Hive Management: Regularly check for pests and diseases, supplement food sources during lean periods, and prepare your bees for winter.
  6. Harvesting Bee Products: Be mindful to leave enough honey for the bees while harvesting. Use a centrifuge for extraction and ensure proper filtering and bottling.

Resources and Further Learning

  1. Join a Beekeeping Club: Local beekeeping associations are treasure troves of knowledge and support.
  2. Utilize Extension Services: Agricultural extensions provide expert advice and resources.
  3. Online Platforms: Websites like Bee Culture and American Bee Journal are excellent for staying updated with beekeeping trends.
  4. Reading is Fundamental: Books like “The Beekeeper’s Handbook” offer a wealth of information.

Conclusion
Embracing beekeeping is a strategic move for farmers in the Pacific Northwest. It enhances crop yields, supports biodiversity, and can generate additional income. Choosing the right bee species is crucial—whether it’s the versatile European honeybee, the orchard-friendly Mason bee, or the cool-weather-loving bumblebee. With the right knowledge, equipment, and community support, integrating beekeeping into your farming practice can be a rewarding and sustainable venture.

Helpful Links for Beekeeping in the Pacific Northwest:

By selecting the appropriate bee species and embracing the practices of sustainable beekeeping, farmers in the Pacific Northwest can enjoy the fruits of a mutually beneficial relationship with these vital pollinators.

a family walking toward their farmhouse as the sunsets

Starting a Small Family Farm: Tips and Best Practices


1. Define Your Vision and Goals

Purpose: Before you begin, understand why you’re starting this farm. Is it to provide food for your family, to generate income, or perhaps both? Your purpose will dictate many of your decisions down the line.

Short-term vs. Long-term Goals: While your immediate goal might be to harvest a particular crop or raise a certain number of livestock, think about where you want your farm to be in 5 or 10 years. Setting both short-term and long-term goals will help you strategize effectively.

2. Start Small

Manageable Scale: Beginning on a smaller scale allows you to make mistakes without catastrophic consequences. It also lets you understand the nuances of farming without feeling overwhelmed.

Experiment: Starting small gives you the flexibility to experiment with different crops or livestock to see what works best for your land and market.

3. Choose the Right Land

Soil Testing: Before purchasing land or deciding on crops, get the soil tested. This will inform you about its nutrient content and pH level, helping you make informed decisions about fertilization and crop selection.

Water Access: Ensure your land has reliable access to clean water. This is crucial for irrigation, livestock, and other farm activities.

4. Invest in Quality Equipment

Research: Don’t just buy the first tractor or plow you see. Research different brands, read reviews, and perhaps even talk to other farmers about their equipment recommendations.

Maintenance: Quality equipment can last a lifetime if properly maintained. Regularly clean, oil, and check your tools and machinery for signs of wear.

5. Focus on Soil Health

Organic Matter: Regularly add organic matter like compost or manure to your soil. This improves its structure, water retention, and nutrient content.

Crop Rotation: Rotating crops prevents soil-borne diseases and pests from building up and can improve soil fertility.

6. Diversify Your Farm

Multiple Income Streams: By diversifying, you’re not putting all your eggs in one basket. If one crop fails or there’s a disease outbreak in one livestock type, you’ll have other sources of income.

Ecological Benefits: Diverse farms can be more resilient to pests and diseases. Different crops and animals can complement and benefit each other in various ways.

7. Keep Detailed Records

Digital vs. Paper: Decide on a system that works for you. While many farmers still prefer traditional record-keeping, there are numerous farm management software options available.

Regular Updates: Set aside time each week to update your records. This habit will prove invaluable when making decisions or assessing your farm’s progress.

8. Connect with Other Farmers

Local Workshops: Attend workshops or seminars in your area. These can be excellent opportunities to learn new techniques and meet experienced farmers.

Online Communities: Join online forums or social media groups related to farming. They can be a treasure trove of information and support.

9. Stay Updated with Market Trends

Consumer Preferences: Understand what consumers in your area prefer. Are organic vegetables in demand? Is there a market for free-range eggs?

Adaptability: Markets change, and successful farmers adapt. Regularly assess market trends and be willing to adjust your strategies accordingly.

10. Prioritize Sustainability

Renewable Energy: Consider investing in renewable energy sources like solar panels or wind turbines for your farm operations.

Conservation Practices: Implement water conservation techniques, such as drip irrigation or rainwater harvesting, to ensure sustainable water use.


Remember, farming is as much about passion and dedication as it is about knowledge and strategy.

tractor pulling a harrow

DIY Harrow for Small Family Farms: How and Why to Build Your Own

Introduction:


Cultivating soil is both a science and an art. And in this spectrum of farming techniques, the humble harrow stands out as a staple. But why is it important, and how can a small family farm create one without breaking the bank? Let’s find out.

Why a Harrow is Essential:
A harrow is indispensable for several reasons:

  1. Aeration: Soil, like us, needs its oxygen. Harrowing aerates the soil, ensuring plant roots get vital air.
  2. Smoothing the Surface: Post-plowing, soil can be clumpy. A harrow gives you that even surface, crucial for seeding.
  3. Nutrient Spread: Have manure or compost? A harrow ensures it’s spread evenly, giving plants consistent nutrients.
  4. Weed Management: Early-stage weeds stand little chance against a harrow, giving crops an uninterrupted growth environment.

Crafting Your DIY Harrow: A Step-by-Step Guide

We’ll build a harrow similar to what you see here on Amazon.

Materials:

  • Chain Link Fence: Opt for a heavy-duty variety, measuring 4 feet by 6 feet.
  • Steel Angle Bars: Two, each being 4 feet in length.
  • U-bolts: Four, complete with nuts.
  • Tow Chain: Steel-based, about 6 feet long.
  • D-rings: Two, heavy-duty.
  • Welder: Optional but recommended for durability.
  • Bolts and Nuts: For securing various components.
  • Washers: Large ones, optional for added weight.

Detailed Build Instructions:

  1. Preparation: Clear a workspace and lay down the chain link fence. Ensure it’s flat without any curls at the edges.
  2. Frame Attachment: Place the steel angle bars parallelly on each of the shorter sides of the chain link fence. This will form the frame of your harrow.
  3. Securing the Chain Link:
    a. Align the U-bolts so they’re evenly spaced along the angle bars.
    b. Loop the U-bolts around the chain link and the angle bars.
    c. Tighten the nuts ensuring the fence is firmly sandwiched between the U-bolt base and the nuts.
  4. Setting up the Tow Points:
    a. On one end of each angle bar, weld or bolt the D-rings, ensuring they’re centered. This is where the harrow will attach to the tractor or mower.
    b. Connect the tow chain to each D-ring. This should create a V-shaped tow setup for balanced pulling.
  5. Additional Weight (If Needed):
    a. Gauge the weight of your harrow by lifting it slightly. If it feels too light, it might not effectively penetrate the soil.
    b. To add weight, evenly distribute and bolt large washers or specific weights across the chain link surface. This will improve the harrow’s soil engagement.
  6. Testing and Towing: Before taking it to the field, test the harrow in a small patch. Adjust weights if needed. Attach the apex of the V-shaped tow chain to your riding mower or tractor, ensuring it’s secure, and you’re ready to harrow!

Conclusion:
Constructing a harrow might seem like a task, but with a bit of effort, it’s a rewarding endeavor. Not only will you save on costs, but there’s a unique satisfaction in using tools made with one’s own hands. So this season, let your DIY harrow be the star of your cultivation process!

Growing Pumpkins and Squash in the Pacific Northwest: A Gardeners’ Delight

Squashes, encompassing the beloved pumpkin, flourish beautifully in the Pacific Northwest’s temperate climate. From small-scale family plots to extensive farm operations, they’ve become a staple for many.

When it comes to variety, pumpkins like ‘Sugar Pie’ are perfect for pies, ‘Howden’ is the go-to for jack-o’-lanterns, and ‘Baby Pam’ offers a smaller decorative touch. Summer squashes such as the ‘Black Beauty’ zucchini and ‘Early Prolific Straightneck’ yellow squash are both popular and reliable. If you’re leaning towards winter squash, consider ‘Delicata’, ‘Butternut’, ‘Acorn’, or ‘Spaghetti’ as these have all proven to fare exceptionally well in our region.

For the ideal growing conditions, select a spot bathed in sunlight for most of the day; squashes adore the sun. The soil should be well-draining and enriched with organic matter. It’s a good practice to mix in some compost or well-rotted manure a few weeks before planting, aiming for a pH level between 6.0 to 7.5. Remember, vining squashes like pumpkins adore space, so provide 50-100 square feet per hill. The bushier varieties will be content with 2-3 feet between plants.

Planting season usually kicks off in late May to early June, ensuring the soil has warmed up to at least 60°F. Seeds should nestle about an inch deep in the soil. If you’re using transplants, they should sit at the same depth they occupied in their containers. Watering is crucial, especially during the initial germination phase and when they flower. Employing drip irrigation or soaker hoses can be a lifesaver as they keep the leaves dry, reducing the risk of fungal diseases.

As your plants grow, you’ll notice that squashes are rather voracious, feeding heavily from the soil. Fertilizing at planting and occasionally adding compost or a high nitrogen source during the growth period can work wonders. To manage weeds, retain moisture, and ensure the fruits remain clean, consider mulching with straw or black plastic. The damp climate of the Pacific Northwest can sometimes invite pests like squash bugs or diseases such as powdery mildew. Regular monitoring, ensuring good air circulation, and occasional use of organic fungicides can keep these at bay.

Come harvest time, summer squashes are best picked when young and tender. As for winter squashes and pumpkins, you’ll want to wait until the rind hardens and fully develops its color. Once harvested, summer squashes are happiest in the refrigerator for up to a week, while the winter varieties prefer a cool, dry place where they can stay fresh for several months.

In essence, cultivating pumpkins and squash in our Pacific Northwest region is a journey of joy and rewards. With attention and care, your garden will burst with hues and flavors ready to grace your table and warm your heart. Happy gardening!

Winter Wheat in the Pacific Northwest: Varieties and Vital Tips

Winter wheat, a crop traditionally sown in the fall and harvested in the summer, has become a staple for many Pacific Northwest farmers. The cool, moist conditions of western Washington can offer an ideal environment for this grain. But how do you choose the right variety and ensure a bountiful harvest?

1. Why Winter Wheat?

  • Erosion Control: Winter wheat’s robust root system helps reduce soil erosion during the rainy season.
  • Weed Suppression: As an early ground cover, winter wheat competes with and suppresses winter weeds.
  • Moisture Utilization: This crop takes advantage of the Pacific Northwest’s winter and spring moisture, reducing the need for additional irrigation.

2. Winter Wheat Varieties for the Pacific Northwest

  • ‘Stephens’: A soft white common wheat, Stephens is known for its high yield and good straw strength. It’s a preferred choice for many due to its resistance to stripe rust.
  • ‘Eltan’: Another soft white variety, Eltan is notable for its tolerance to cold temperatures and its strong resistance against stripe rust and snow mold.
  • ‘Madsen’: Widely grown, Madsen is a soft white variety that has shown consistent yields and strong disease resistance, particularly against stripe rust.
  • ‘Xerpha’: A more recent addition, Xerpha is a soft white wheat with high yield potential and solid resistance against stripe rust.

While soft white winter wheat is predominantly grown in the Pacific Northwest, hard red winter wheat varieties can also be found, albeit in smaller quantities.

3. Tips for Growing Winter Wheat Successfully

  • Soil Preparation: Ensure well-draining soil. Incorporate organic matter or compost to enhance soil fertility. Before sowing, consider a soil test to determine nutrient needs.
  • Sowing: Ideally, sow winter wheat about 4-6 weeks before the first hard freeze. This allows the plant to establish strong roots without producing too much top growth.
  • Depth: Aim for a seeding depth of 1-1.5 inches. Proper depth ensures better root establishment and protection from winter cold.
  • Spacing: Drilled seeding typically requires 20-30 seeds per square foot. Precise spacing aids in optimal growth and reduces competition between plants.
  • Pest and Disease Management: Monitor for common pests like aphids and diseases like stripe rust or snow mold. Timely identification and treatment are crucial. Rotate crops to reduce disease buildup.
  • Watering: While the rainy season in the Pacific Northwest might provide adequate moisture, ensure consistent soil moisture, especially during dry spells. However, avoid waterlogging, as wheat is sensitive to overly wet conditions.
  • Harvesting: Harvest when grains are hard and moisture content is around 12-15%. Too much moisture can lead to spoilage, while too little can shatter the grain.

In summary, winter wheat offers Pacific Northwest farmers a sustainable and profitable option for winter cropping. With the right variety selection, proper cultivation practices, and diligent monitoring, this grain can become a cornerstone of your farm’s annual cycle. Embrace the wheat wave!

a farmhouse and fields in early winter with frost and snow lightly covering the ground

Protecting Winter Crops in the Pacific Northwest: Beyond the Frost

See our first post in this series about fall and winter farming: Winter Crops for the Pacific Northwest: Thriving in the Chill

In western Washington, winter farming offers its own set of challenges and rewards. While we’ve previously explored the range of crops suitable for this chilly season, it’s essential to understand the protective measures you can take to safeguard these investments against freezing and other potential risks.

1. Understanding Frost and Its Effects
Frost occurs when water vapor condenses and freezes on surfaces, and it can damage or kill plants. Cells inside the plant can burst when water inside them freezes, leading to the plant’s demise.

2. Protective Measures against Freezing

Mulching: Applying a thick layer of organic mulch like straw or leaves can help retain soil moisture, suppress weeds, and insulate the soil, protecting roots from freezing temperatures.

Row Covers: Floating row covers made of lightweight fabric can be draped over plants, providing a few degrees of frost protection without smothering the plants.

Cold Frames: Essentially mini-greenhouses, cold frames are bottomless boxes with transparent tops. They trap heat and shield plants from cold winds, providing a microclimate that’s several degrees warmer than the surroundings.

Hoophouses and Low Tunnels: These are larger structures that cover garden beds, utilizing metal or PVC hoops draped with plastic or fabric. They provide a protected environment similar to cold frames but on a larger scale.

Water Before a Frost: Moist soil retains heat better than dry soil. Watering your plants the evening before a frost can help protect them, as the soil will release moisture overnight, raising the ambient temperature.

3. Other Winter Risks and Protection Strategies

Pest Control: Winter might reduce the number of pests, but some like slugs, snails, and certain rodents are still active. Regularly inspect plants, use slug bait, and consider setting traps for rodents.

Avoiding Waterlogged Soil: While watering is essential, overwatering, especially in our damp climate, can lead to root rot. Ensure proper drainage by raising beds or adding sand or gravel to the soil.

Wind Protection: High winds, especially cold ones, can desiccate plants and cause physical damage. Windbreaks, like hedges, fences, or even strategically placed bales of straw, can mitigate this.

Snow: While snow can insulate plants from extreme cold, heavy snow can break plant stems or collapse protective structures. After a snowfall, gently brush off excess snow from plants and structures.

4. Know When to Harvest

Some crops, like kale and Brussels sprouts, can tolerate and even benefit from a light frost. But for others, it’s essential to know when to harvest before potential damage. Keep an eye on weather forecasts and be prepared to harvest if severe freezes are predicted.

In conclusion, while winter farming in the Pacific Northwest has its challenges, with foresight and proactive measures, you can protect your crops and enjoy bountiful yields. Winter, in its silent beauty, can indeed be a season of growth. Happy and safe farming!


a rural farmhouse in winter

Winter Crops for the Pacific Northwest: Thriving in the Chill

This is part one of a series of articles we will do focusing on farming during the fall and and winter.

The Pacific Northwest, especially western Washington, is known for its temperate climate and occasional winter snowfalls. While many crops prefer the sunnier, warmer months, several hardy varieties can be successfully cultivated throughout the winter here. Growing these crops not only extends your farm’s productive season but also makes use of soil and space that would otherwise remain dormant.

1. Why Winter Crops?

  • Soil Health: Winter crops can help in preventing soil erosion and suppressing weed growth.
  • Nitrogen Fixation: Some crops, like legumes, fix nitrogen in the soil, prepping it for spring plantings.
  • Revenue Stream: These crops can offer an extended income source and diversify a farm’s offerings.

2. Top Crops to Grow During Winter

  • Brassicas: This family includes kale, Brussels sprouts, and collard greens. These leafy greens can handle the cold, and some even get sweeter after a frost.
  • Winter Lettuce: Varieties like ‘Winter Gem’ are cold-resistant and can provide a continuous supply of fresh greens.
  • Spinach: Certain types of spinach, like ‘Winter Bloomsdale,’ are suited to colder temperatures and shorter days.
  • Root Vegetables: Carrots, beets, and parsnips can be sown in late summer and harvested throughout the winter. They sweeten up after the first frost.
  • Peas: Planting peas in fall can lead to an early spring harvest. Snow peas are a favorite, thriving in the cooler season.
  • Garlic: Plant in the fall for a summer harvest. The long growing season helps develop those deep, robust flavors.

3. Tips for Growing Winter Crops in Western Washington

  • Prepare the Soil: Since the ground can become more compact in the winter, ensure good drainage by adding compost or sand. This helps prevent root crops from rotting.
  • Choose the Right Varieties: Always opt for winter-hardy or cold-tolerant varieties specific to our region.
  • Protect Your Crops: Consider using row covers or cold frames for added protection against severe frosts and to extend the growing season.
  • Mind the Shorter Days: Remember, winter crops grow more slowly. Not only because of the cold but also due to reduced daylight hours. Be patient and monitor their growth.
  • Watering: While the Pacific Northwest can be wet, ensure that your crops are receiving adequate water, especially during dry spells. Overhead watering can be reduced, focusing more on root-level irrigation to avoid freezing on foliage.

4. Differences from Spring and Summer Growing

  • Pest Control: One advantage of winter farming is fewer pests. However, keep an eye out for slugs and snails, which thrive in our damp climate.
  • Growth Speed: Winter crops grow slower than their spring and summer counterparts. Adjust your expectations and harvest timelines accordingly.
  • Frost Vigilance: While many winter crops tolerate frost, it’s essential to be prepared for sudden severe temperature drops. Having protective measures in place can be the difference between a successful crop and a lost one.

In conclusion, winter farming in western Washington can be both rewarding and productive. With careful planning, soil preparation, and the right crop choices, your farm can flourish year-round. Happy farming!

Choosing and Maintaining Greenhouses in the PNW Climate

The Pacific Northwest (PNW) is a region of unparalleled beauty, characterized by its dense forests, majestic mountains, and a coastline that stretches as far as the eye can see. However, for gardeners and farmers, the PNW’s often rainy and cool climate presents unique challenges. Enter the greenhouse—a haven for plants and a game-changer for those passionate about growing in this region. In this post, we’ll explore the advantages of using greenhouses in the PNW and offer insights into selecting and maintaining one for optimal plant growth.

The Greenhouse Advantage in the PNW

The PNW climate, while idyllic in many ways, has its quirks. Extended rainy seasons, cooler temperatures, and shorter daylight hours in winter can limit the growing season and the types of plants that can thrive outdoors. Here’s where a greenhouse steps in:

  1. Extended Growing Season: A greenhouse can capture and retain heat, allowing for a longer growing season. This means early starts in the spring and extended harvests into the fall, or even winter.
  2. Protection from Elements: Plants are shielded from the excessive rain, which can lead to fungal diseases or waterlogged soils. They’re also protected from unexpected frosts or cold snaps.
  3. Versatility: With a controlled environment, you can grow a wider variety of plants, including those that wouldn’t typically thrive in the PNW outdoors.
  4. Pest Control: Greenhouses can act as a barrier against many pests, reducing the need for chemical interventions.

Choosing the Right Greenhouse for the PNW

Given the specific challenges of the PNW climate, not just any greenhouse will do. Here’s what to consider:

  1. Material: Polycarbonate panels are a popular choice. They offer good insulation, are durable, and provide diffused light, which can be beneficial for plant growth. Polyethylene film is another option, being cost-effective and offering a good amount of light transmission.
  2. Ventilation: Proper ventilation is crucial to prevent overheating during sunny days and to ensure a steady supply of fresh air. Roof vents, louvre windows, and exhaust fans can help regulate temperature and humidity.
  3. Size and Shape: The size will depend on your needs and available space. A hoop house or tunnel might be suitable for larger operations, while a smaller freestanding or lean-to greenhouse might be ideal for backyard gardeners. Remember, taller greenhouses can capture more heat and offer better ventilation.
  4. Flooring: Gravel is a popular choice, as it provides excellent drainage and can deter pests. Concrete or pavers are other options, though they might require additional drainage solutions.
  5. Orientation: In the PNW, maximizing light is crucial. Ideally, the longest side of the greenhouse should face south to capture the most sunlight.

Maintaining Your Greenhouse for Optimal Growth

Once you’ve selected the perfect greenhouse, maintenance is key:

  1. Regular Cleaning: Keeping the panels clean ensures maximum light penetration. It also helps prevent diseases and pests. Use a mild detergent and soft brush to clean the exterior and interior as needed.
  2. Monitor Temperature and Humidity: Invest in a good quality thermometer and hygrometer. During warmer months, use shade cloths and ensure proper ventilation to prevent overheating.
  3. Watering: While plants in a greenhouse might be protected from rain, they can still lose moisture quickly. Regular watering is essential, but avoid overwatering, which can lead to mold and diseases.
  4. Inspect for Pests and Diseases: Regularly inspect plants for signs of pests or diseases. Introduce beneficial insects, like ladybugs or predatory mites, if needed.
  5. Winter Care: In the colder months, consider using a greenhouse heater or thermal blankets to protect against frost. Ensure that snow doesn’t accumulate on the roof, as the weight can damage the structure.

Conclusion

A greenhouse can be a gardener’s best friend in the Pacific Northwest, turning challenges into opportunities and extending the joy of growing throughout the year. By choosing the right structure and committing to its maintenance, you can create a thriving oasis that defies the whims of the PNW weather, ensuring bountiful harvests and vibrant blooms season after season.

a field showing different types of crops being grown

The Ideal PNW Crop Rotation for Soil Health

The Pacific Northwest, with its temperate climate and rich soils, offers a unique environment for farming. However, to maintain the health and productivity of our soils, it’s crucial to understand and implement effective crop rotation strategies. Crop rotation not only ensures soil fertility but also aids in preventing soil-borne diseases and pests. Let’s delve into the best practices for crop rotation in the PNW and highlight crops that thrive in our region.

Why Crop Rotation Matters

At its core, crop rotation is the practice of growing different crops in succession on the same piece of land. This method offers several benefits:

1. Soil Fertility: Different crops have varying nutrient requirements. By rotating crops, we can ensure that the soil isn’t depleted of specific nutrients. Some crops, like legumes, can even fix nitrogen from the air, enriching the soil.

2. Disease and Pest Control: Many pests and diseases are crop-specific. By changing the crops each season, we can break the life cycle of these pests and diseases, reducing their impact.

3. Soil Structure and Erosion: Certain crops, like grasses or deep-rooted plants, can improve soil structure and reduce erosion.

The PNW Crop Rotation Blueprint

Given the unique climate and challenges of the PNW, here’s a suggested rotation plan:

1. Year 1 – Legumes: Start with nitrogen-fixing legumes like peas or beans. These crops will enrich the soil by adding nitrogen, an essential nutrient for many plants.

2. Year 2 – Leafy Greens: Capitalize on the nitrogen-rich soil by planting leafy greens like spinach, kale, or lettuce. These plants thrive on nitrogen and will grow lush and healthy.

3. Year 3 – Root Crops: Rotate to root crops like carrots, beets, or potatoes. These crops benefit from the well-structured soil left by the leafy greens and help in breaking up the soil further.

4. Year 4 – Fruit-bearing Plants: Tomatoes, peppers, or cucumbers can be introduced now. These plants require a balanced soil profile, which has been achieved through the previous rotations.

5. Year 5 – Grains or Grasses: Consider planting grains like barley, wheat, or cover crops like ryegrass. These plants have deep roots that improve soil structure and prevent erosion.

Additional Tips for Successful Rotation

– Intercropping: Consider planting two or more crops together. For instance, planting radishes with carrots can help in pest control.

Cover Crops: During off-seasons or fallow periods, consider planting cover crops. These crops, like clover or vetch, can protect the soil from erosion, suppress weeds, and improve soil health.

Soil Testing: Regularly test your soil to understand its nutrient profile. This will help in making informed decisions about the next crop in the rotation.

In conclusion, crop rotation is an age-old practice that holds immense relevance even today, especially in regions like the PNW. By understanding the needs of our soil and the benefits of different crops, we can ensure sustainable and productive farming for years to come. Remember, healthy soil is the foundation of a thriving farm. Rotate wisely!


crops planted in parallel beds